Ubuntu แก้ไข motd
ปิดระบบ dynamic MOTD (ให้แสดงแค่ /etc/motd)
sudo chmod -x /etc/update-motd.d/*
sudo nano /etc/motd
วิธีการใช้งาน scrcpy เพื่อ mirror หน้าจอ samsung s24 บนเครื่อง mac
#ที่มือถือให้ทำการเปิด Developer Mode
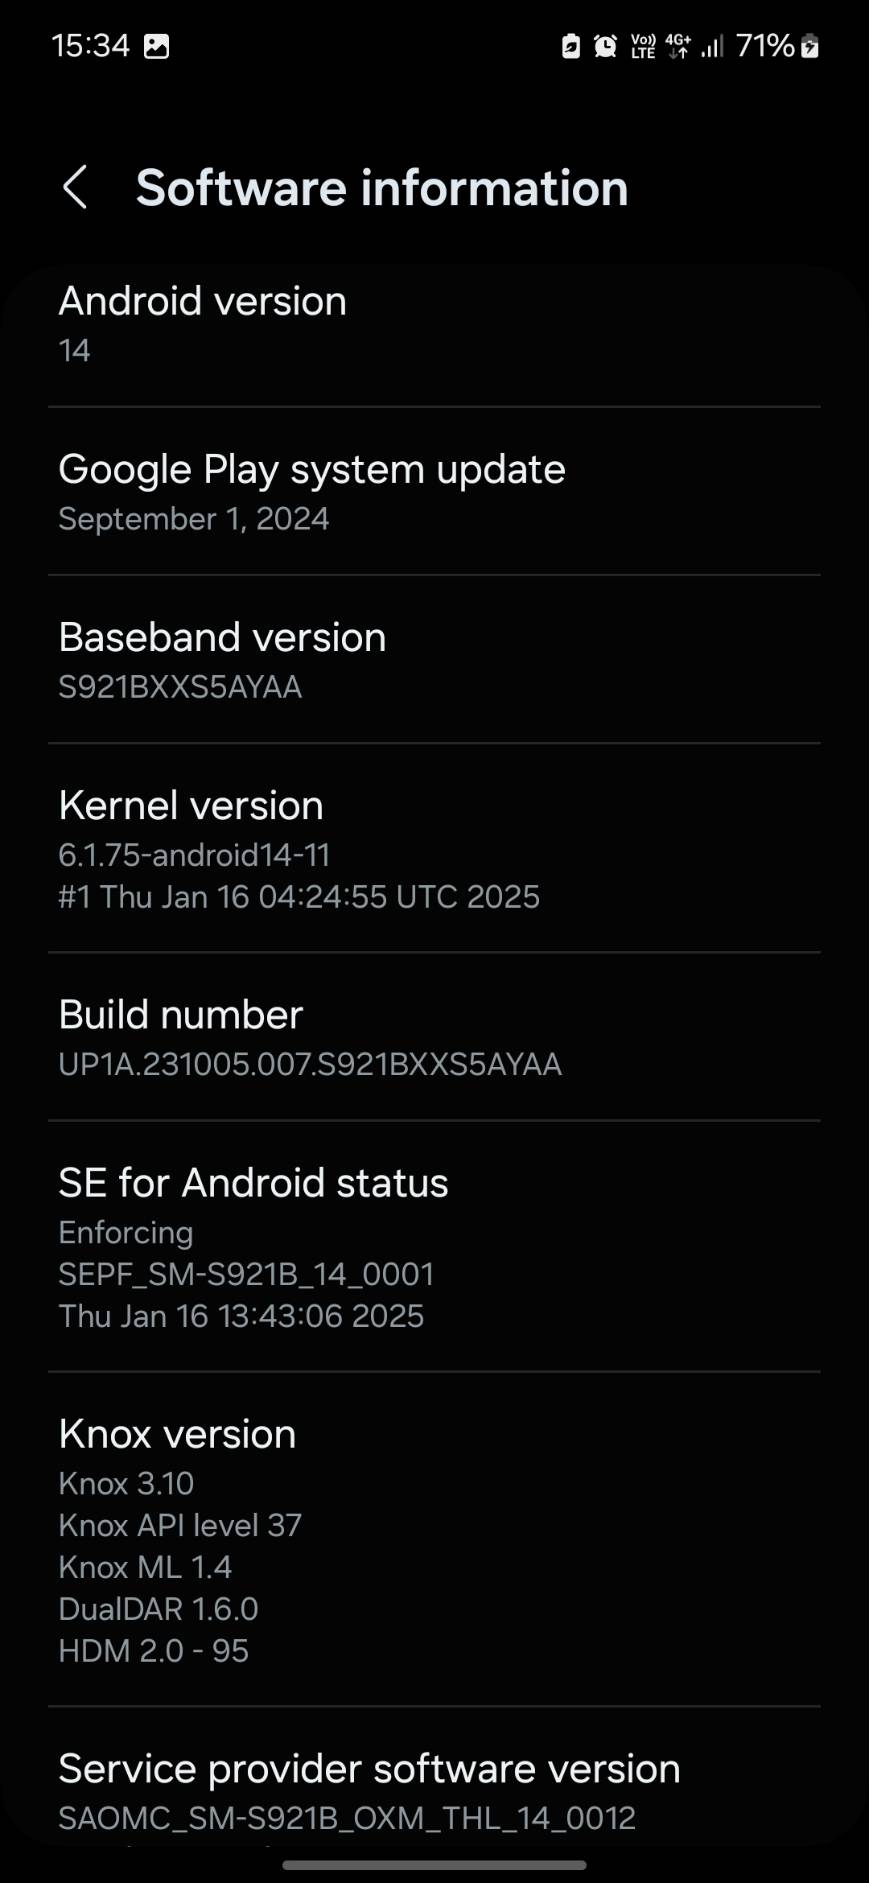
1. ไปที่ settings > About phone > Software information >
กดย้ำๆที่ Build number 7 ครั้ง มือถือจะแจ้งว่า Developer mode On
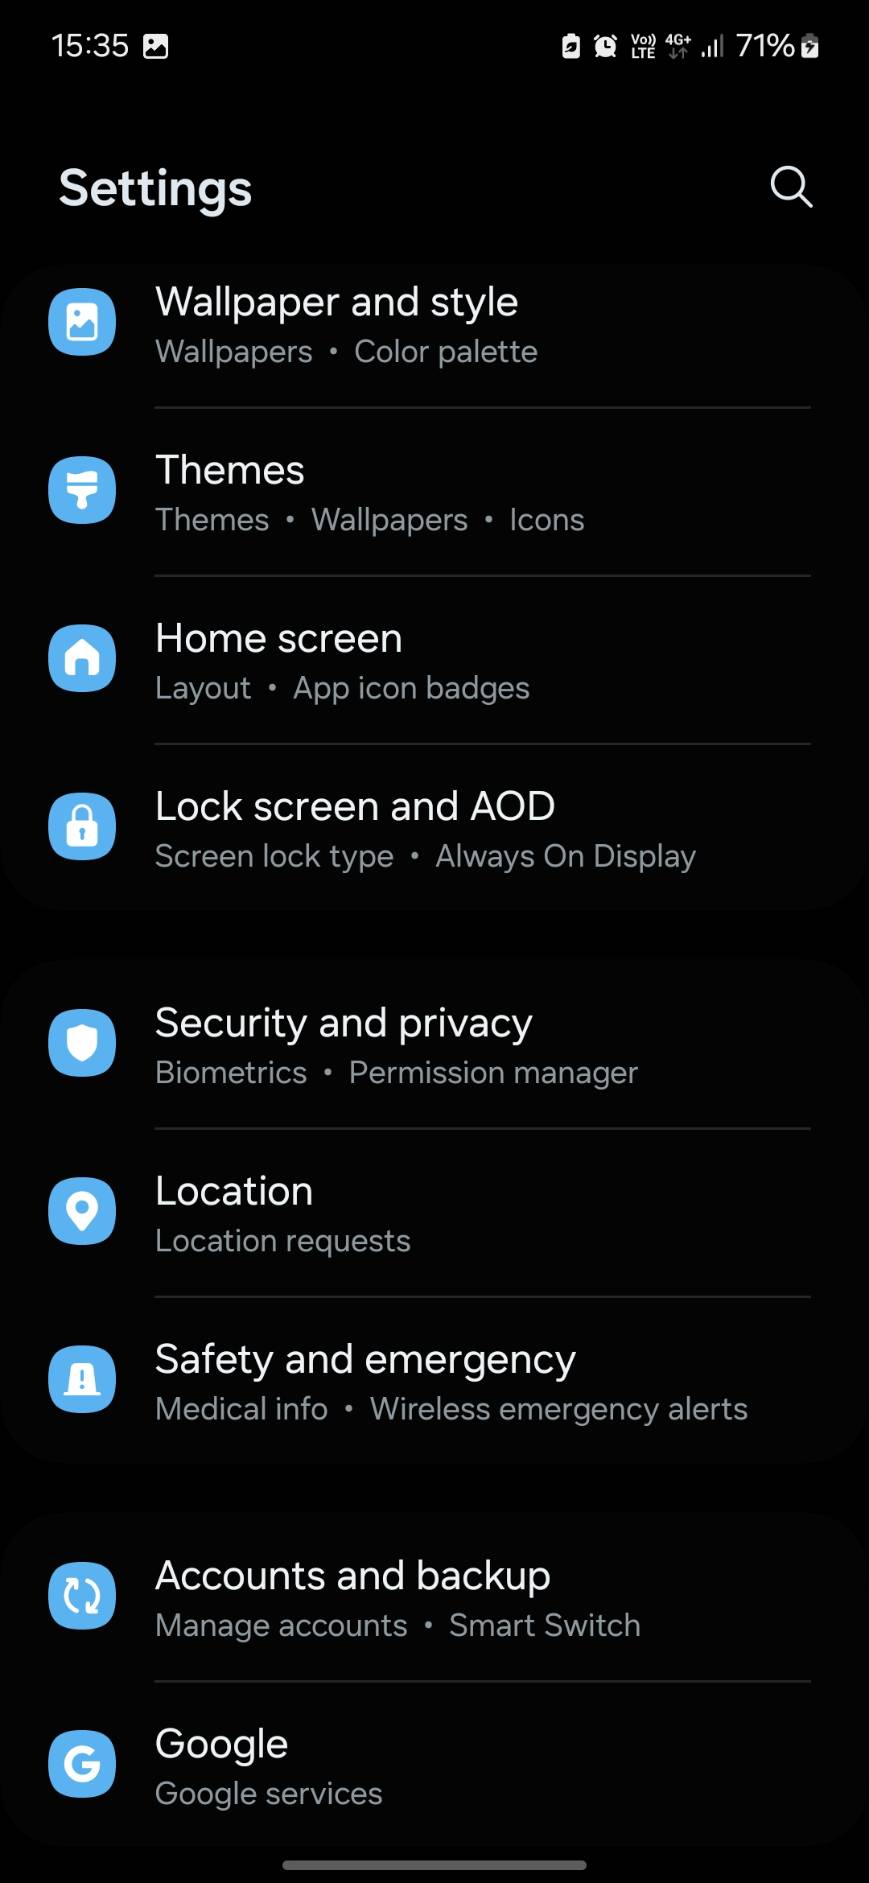
2. เลือก Settings > Security and privacy. กด ปิด Auto Blocker

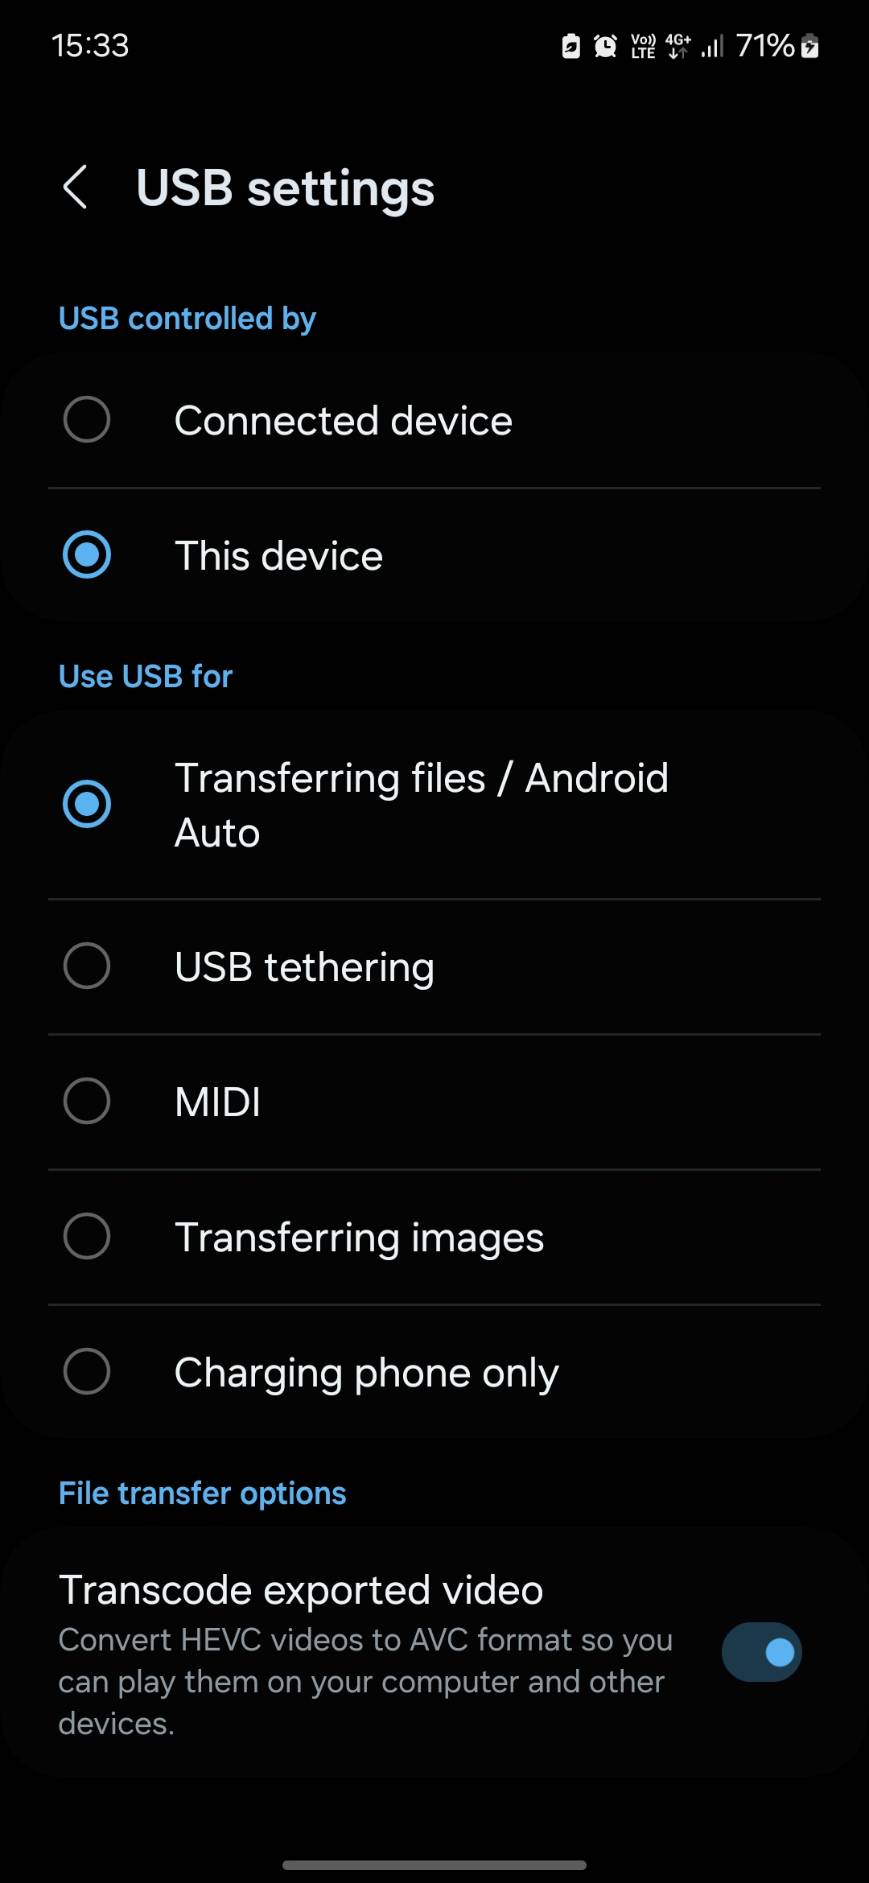
3. ที่เครื่องมือถือจะมีป๊อปอัพเตือนว่ามีการเสียบสาย USB เข้ากับเครื่อง MAC. ให้เลือกใช้งานตามจุดประสงค์
4. ให้ทำการติดตั้งโปรแกรม scrcpy โดยจะติดตั้งผ่าน homebrew.
ถ้ายังไม่เคยติดตั้งใช้งาน homebrew ให้ไปติดตั้ง homebrew ก่อน
ติดตั้ง Homebrew บน Mac (ถ้ายังไม่มี)
# /bin/bash -c “$(curl -fsSL https://raw.githubusercontent.com/Homebrew/install/HEAD/install.sh)”
5. จากนั้นติดตั้ง ADB และ scrcpy ผ่าน Homebrew
brew install android-platform-tools # สำหรับ ADB
brew install scrcpy # ติดตั้ง scrcpy
6.เชื่อมต่อ S24 เข้ากับ Mac ผ่าน USB-C Cable
•ใช้สายแท้ หรือสายที่รองรับ Data Transfer
•หลังเสียบ → บนมือถือจะขึ้น “Allow USB Debugging?” → กด Allow
7.ตรวจสอบว่า Mac เจอ S24 หรือไม่
พิมพ์ใน Terminal:
adb devices
ถ้าเจออุปกรณ์มือถือจะแจ้งว่า
List of devices attached
xxxxxxxxxxxx device
8. รัน scrcpy
teee@NP Programs % scrcpy
scrcpy 3.1 <https://github.com/Genymobile/scrcpy>
INFO: ADB device found:
INFO: –> (usb) RFCxxxxxxxx device SM_S921B
/opt/homebrew/Cellar/scrcpy/3.1/share/scrcpy/scrcpy-server: 1 file pushed, 0 skipped. 106.3 MB/s (90640 bytes in 0.001s)
[server] INFO: Device: [samsung] samsung SM-XXXXX (Android 14)
INFO: Renderer: metal
INFO: Texture: 1080×2336
2025-03-17 15:31:22.355 scrcpy[37968:994087] +[IMKClient subclass]: chose IMKClient_Modern
2025-03-17 15:31:22.355 scrcpy[37968:994087] +[IMKInputSession subclass]: chose IMKInputSession_Modern

Install freeswitch 1.10.12 on debian12
root@san:~# apt-get update && sudo apt upgrade -y
root@san:~# apt-get install -y git build-essential autoconf automake libtool-bin g++ python3-dev uuid-dev zlib1g-dev libjpeg-dev libncurses5-dev libssl-dev libpcre3-dev libdb-dev libsndfile1-dev libedit-dev libldns-dev libcurl4-openssl-dev libpq-dev libspeex-dev libspeexdsp-dev libsqlite3-dev libopus-dev libsndfile1-dev libtiff-dev libavformat-dev libswscale-dev liblua5.2-dev liblua5.3-dev libmpg123-dev libpq-dev libvpx-dev libopusfile-dev libshout3-dev libfreeimage-dev libyuv-dev libx264-dev cmake pkg-config libbroadvoice16-dev libsilk-dev libflite1-dev libilbc-dev libgsm1-dev libopenh264-dev unzip wget libswresample-dev
E: Package ‘libavresample-dev’ has no installation candidate
แพ็กเกจ libavresample-dev ถูกลบออกจาก Debian 12 (Bookworm) เนื่องจาก FFmpeg ได้เลิกใช้ libavresample แล้ว
apt install libswresample-dev
Download Freeswitch
https://files.freeswitch.org/freeswitch-releases/
root@san:~# cd /usr/src
root@san:/usr/src# wget https://files.freeswitch.org/freeswitch-releases/freeswitch-1.10.12.-release.tar.gz
root@san:/usr/src# tar xvf freeswitch-1.10.12.-release.tar.gz
root@san:/usr/src# cd freeswitch-1.10.12.-release
root@san:/usr/src/freeswitch-1.10.12.-release# ./rebootstrap.sh
เปืด Modules ที่ต้องการที่จะใช้งาน
root@san:/usr/src/freeswitch-1.10.12.-release# nano modules.conf
say/mod_say_th
databases/mod_mariadb
root@san:/usr/src/freeswitch-1.10.12.-release# ./configure –prefix=/usr/local/freeswitch –enable-core-pgsql-support
root@san:/usr/src/freeswitch-1.10.12.-release# make -j$(nproc)
make[4]: Entering directory ‘/usr/src/freeswitch-1.10.12.-release/src/mod/applications/mod_spandsp’
CC mod_spandsp_la-mod_spandsp.lo
CC mod_spandsp_la-udptl.lo
CC mod_spandsp_la-mod_spandsp_fax.lo
CC mod_spandsp_la-mod_spandsp_dsp.lo
mod_spandsp_dsp.c: In function ‘get_v18_mode’:
mod_spandsp_dsp.c:159:17: error: ‘V18_MODE_5BIT_4545’ undeclared (first use in this function)
159 | int r = V18_MODE_5BIT_4545;
| ^~~~~~~~~~~~~~~~~~
mod_spandsp_dsp.c:159:17: note: each undeclared identifier is reported only once for each function it appears in
mod_spandsp_dsp.c:165:29: error: ‘V18_MODE_5BIT_50’ undeclared (first use in this function)
165 | r = V18_MODE_5BIT_50;
| ^~~~~~~~~~~~~~~~
mod_spandsp_dsp.c: In function ‘spandsp_tdd_send_session’:
mod_spandsp_dsp.c:216:21: error: too few arguments to function ‘v18_init’
216 | tdd_state = v18_init(NULL, TRUE, get_v18_mode(session), V18_AUTOMODING_GLOBAL, put_text_msg, NULL);
| ^~~~~~~~
In file included from /usr/local/include/spandsp.h:114,
from mod_spandsp.h:50,
from mod_spandsp_dsp.c:36:
/usr/local/include/spandsp/v18.h:138:29: note: declared here
138 | SPAN_DECLARE(v18_state_t *) v18_init(v18_state_t *s,
| ^~~~~~~~
mod_spandsp_dsp.c: In function ‘spandsp_tdd_encode_session’:
mod_spandsp_dsp.c:263:26: error: too few arguments to function ‘v18_init’
263 | pvt->tdd_state = v18_init(NULL, TRUE, get_v18_mode(session), V18_AUTOMODING_GLOBAL, put_text_msg, NULL);
| ^~~~~~~~
/usr/local/include/spandsp/v18.h:138:29: note: declared here
138 | SPAN_DECLARE(v18_state_t *) v18_init(v18_state_t *s,
| ^~~~~~~~
mod_spandsp_dsp.c: In function ‘spandsp_tdd_decode_session’:
mod_spandsp_dsp.c:341:26: error: too few arguments to function ‘v18_init’
341 | pvt->tdd_state = v18_init(NULL, FALSE, get_v18_mode(session), V18_AUTOMODING_GLOBAL, put_text_msg, pvt);
| ^~~~~~~~
/usr/local/include/spandsp/v18.h:138:29: note: declared here
138 | SPAN_DECLARE(v18_state_t *) v18_init(v18_state_t *s,
ที่เป็นแบบนี้เพราะ Module mod_spandsp มี BUG ที่แก้ไขแล้วแต่ไม่ได้แก้ไขที่ Code Release จะต้องทำการ patch ก่อน
https://github.com/zenthangplus/ansible-role-fsmrf/blob/9a73a47bfa19a485ddfc10f496bfc2041594f552/files/mod_spandsp_dsp.c.patch
root@san:/usr/src/freeswitch-1.10.12.-release# cd src/mod/applications/mod_spandsp/
root@san:/usr/src/freeswitch-1.10.12.-release/src/mod/applications/mod_spandsp# wget https://raw.githubusercontent.com/zenthangplus/ansible-role-fsmrf/9a73a47bfa19a485ddfc10f496bfc2041594f552/files/mod_spandsp_dsp.c.patch
root@san:/usr/src/freeswitch-1.10.12.-release/src/mod/applications/mod_spandsp# root@san:/usr/src/freeswitch-1.10.12.-release/src/mod/applications/mod_spandsp# patch -p0 < mod_spandsp_dsp.c.patch ลอง make ดู
root@san:/usr/src/freeswitch-1.10.12.-release/src/mod/applications/mod_spandsp# make ถ้าไม่มี error ก็กลับไปลอง สั่ง make freeswitch ใหม่
root@san:/usr/src/freeswitch-1.10.12.-release/src/mod/applications/mod_spandsp# cd /usr/src/freeswitch-1.10.12.-release root@san:/usr/src/freeswitch-1.10.12.-release# make clean
ปรับแต่ง Banner
root@san:/usr/src/freeswitch-1.10.12.-release# cd libs/esl/
root@san:/usr/src/freeswitch-1.10.12.-release/libs/esl/
#ee fs_cli.c static const char *banner =”YOUR BANNER email@mydomain.com”;
root@san:/usr/src/freeswitch-1.10.12.-release/libs/esl# cd /usr/src/freeswitch-1.10.12.-release/src/include/
root@san:/usr/src/freeswitch-1.10.12.-release/src/include# mv cc.h cc.bak root@san:/usr/src/freeswitch-1.10.12.-release/src/include# nano cc.h const char *cc = “”; const char *cc_s = “”;
root@san:/usr/src/freeswitch-1.10.12.-release/src/include# cd ../../
root@san:/usr/src/freeswitch-1.10.12.-release# ./configure –prefix=/usr/local/freeswitch –enable-core-pgsql-support
root@san:/usr/src/freeswitch-1.10.12.-release# make install tab >q. กด Y
root@san:/usr/src/freeswitch-1.10.12.-release# make cd-sounds-install && make cd-moh-install && make uhd-sounds-install && make uhd-moh-install && make hd-sounds-install && make hd-moh-install && make sounds-install && make moh-install
root@san:/usr/src/freeswitch# make samples
root@san:/usr/local/freeswitch/conf/autoload_configs# cp event_socket.conf.xml event_socket.conf.orig
root@san:/usr/local/freeswitch/conf/autoload_configs# nano event_socket.conf.xml
<configuration name=”event_socket.conf” description=”Socket Client”>
<settings>
<param name=”listen-ip” value=”0.0.0.0″/>
<param name=”listen-port” value=”8021″/>
<param name=”password” value=”(YourPass)”/>
<!–<param name=”apply-inbound-acl” value=”loopback.auto”/>–>
<!–<param name=”stop-on-bind-error” value=”true”/>–>
</settings>
</configuration>
root@san:/etc# nano /etc/fs_cli.conf
[default]
; Put me in /etc/fs_cli.conf or ~/.fs_cli_conf
key_f1 => help
key_f2 => status
key_f3 => show channels
key_f4 => show calls
key_f5 => sofia status
key_f6 => reloadxml
key_f7 => /log console
key_f8 => /log debug
key_f9 => sofia status profile internal
key_f10 => fsctl pause
key_f11 => fsctl resume
key_f12 => version
[default]
profile => (Your Profile Name)
host => 127.0.0.1
port => 8021
password => (YourPass)
debug => 2
loglevel => debug
root@san:/etc# cd /usr/local/freeswitch/bin
root@san:/usr/local/freeswitch/bin# ln -s /usr/local/freeswitch/bin/freeswitch /bin/freeswitch
root@san:/usr/local/freeswitch/bin# ln -s /usr/local/freeswitch/bin/fs_cli /bin/fs_cli
root@san:/usr/local/freeswitch/bin# cd /usr/local/freeswitch/conf/
root@san:/usr/local/freeswitch/conf# cp vars.xml vars.orig
root@san:/usr/local/freeswitch/conf# nano vars.xml
<X-PRE-PROCESS cmd=”set” data=”ChangeDefaultPasswordToYourPassword”/>
Goto
FreeSWICH will default to $${local_ip_v4} unless changed. Changing this setting does
affect the sip authentication. Please review conf/directory/default.xml for more
information on this topic.
<!– Specific Macro Variables for Networking –>
<X-PRE-PROCESS cmd=”set” data=”domain=yourdomain.com”/>
<X-PRE-PROCESS cmd=”set” data=”local_ip_v4=(Your_IP_Address)”/>
<X-PRE-PROCESS cmd=”set” data=”local_mask_v4=(Your_Netmask)”/>
<X-PRE-PROCESS cmd=”set” data=”internet_public_ip_v4=(Your_Public_IP_Address)”/>
<X-PRE-PROCESS cmd=”set” data=”hostname=PBX”/>
<X-PRE-PROCESS cmd=”set” data=”session_name=PBX”/
<X-PRE-PROCESS cmd=”stun-set” data=”external_rtp_ip=(Your_Public_IP_Address)”/>
<X-PRE-PROCESS cmd=”stun-set” data=”external_sip_ip=(Your_Public_IP_Address)”/>
<X-PRE-PROCESS cmd=”set” data=”outbound_caller_name=(Your_Outbound_Number)”/>
<X-PRE-PROCESS cmd=”set” data=”outbound_caller_id=(Your_Outbound_Number)”/>
Save:Exit
ถ้ายังไม่มี freeswitch Start Script ให้ลอง Start ด้วย Command นี้ดู
root@san:# freeswitch -nonat -nc &
และลอง ใช้คำสั่ง netstat -lntup เพื่อดู freeswitch process
ลองใช้ fs_cli เพื่อเข้า console ดู
root@san:/usr/local/freeswitch/conf/autoload_configs# fs_cli
pbx.omtel.ltd teee@khun-teee.com
Type /help to see a list of commands
[This app Best viewed at 160×60 or more..]
+OK log level [7]
root@san:/usr/local/freeswitch/conf# nano /etc/systemd/system/freeswitch.service
[Unit]
Description=FreeSWITCH
After=network.target
[Service]
User=root
Group=root
WorkingDirectory=/usr/local/freeswitch
ExecStart=/usr/local/freeswitch/bin/freeswitch -u root -g root -nonat -nc
Restart=always
LimitCORE=infinity
LimitNOFILE=100000
LimitNPROC=60000
LimitSTACK=24000000
LimitRTPRIO=99
LimitRTTIME=7000000
IOSchedulingClass=realtime
IOSchedulingPriority=2
CPUQuota=80%
CPUSchedulingPolicy=rr
CPUSchedulingPriority=89
[Install]
WantedBy=multi-user.target
root@san:/usr/local/freeswitch/conf# sudo systemctl enable freeswitch
ข้อความ “Unable to negotiate with (router ip address) port 22: no matching key exchange method found”
ข้อความ “Unable to negotiate with 192.168.100.8 port 22: no matching key exchange method found” เกิดขึ้นเพราะ:
>Cisco IOS ใช้ Diffie-Hellman (DH) แบบเก่า เช่น diffie-hellman-group14-sha1 หรือ diffie-hellman-group-exchange-sha1
>SSH Client (เช่น OpenSSH, PuTTY) ไม่รองรับ DH แบบเก่าด้วยเหตุผลด้านความปลอดภัย
วิธีแก้ไข
1. ใช้ SSH Client ที่รองรับ DH แบบเก่า (ชั่วคราว)
หากใช้ OpenSSH บน Linux/macOS ให้ลองระบุ Key Exchange (KEX) ที่รองรับ:
#ssh -o KexAlgorithms=+diffie-hellman-group14-sha1 admin@192.168.x.x
หรือ
#ssh -o KexAlgorithms=+diffie-hellman-group-exchange-sha1 admin@192.168.x.x
ข้อเสีย: วิธีนี้ปลอดภัยน้อยลง ควรใช้แค่ชั่วคราว
2. เปิดใช้ Key Exchange ที่ใหม่กว่าใน Cisco Router
ถ้าเข้าถึง CLI ของ Cisco Router ได้ ให้เพิ่ม Key Exchange ที่รองรับ SHA2 หรือ ECDH
Router#configure terminal
Router#ip ssh dh min size 2048
Router#exit
Routetr#write memory # บันทึกค่า
จากนั้นลอง SSH ใหม่อีกครั้ง
3. อัปเกรด OpenSSH หรือ Cisco IOS (ถ้าเป็นไปได้)
>บน Linux/macOS อัปเดต OpenSSH เป็นเวอร์ชันใหม่ล่าสุด
>บน Cisco Router ถ้าใช้ IOS รุ่นเก่า ควรอัปเกรดเป็น IOS 15.7 หรือใหม่กว่า
แก้ปัญหา %Error opening tftp://255.255.255.255/(hostname)-confg (Timed out)
Error นี้มักเกิดขึ้นใน Cisco Router หรือ Switch เนื่องจากอุปกรณ์พยายามหาไฟล์ network-confg หรือ router-confg จาก TFTP Server เพื่อใช้เป็น Auto Configuration แต่ไม่มีไฟล์นั้นอยู่จริง
วิธีแก้ไข
1. ปิดการค้นหา Auto Configuration บน TFTP
หากไม่ต้องการให้ Router หรือ Switch ค้นหาไฟล์ network-confg สามารถปิดการทำงานนี้ได้โดยใช้คำสั่ง:
Router#configure terminal
Router#no service config
Router#exit
Router#write memory # บันทึกการตั้งค่า
คำสั่ง no service config ปิดฟังก์ชันการค้นหาไฟล์ Config ผ่าน TFTP Server
2. ตรวจสอบว่ามีการตั้งค่า BOOTP หรือ DHCP Option 66 ไว้หรือไม่
ถ้าอุปกรณ์ได้รับ IP จาก DHCP และ DHCP Server ส่ง Option 66 (TFTP Server) ไปด้วย อาจทำให้อุปกรณ์พยายามดาวน์โหลด Config จาก TFTP โดยอัตโนมัติ
ให้ตรวจสอบการตั้งค่า DHCP ด้วยคำสั่ง:
Router#show running-config | include dhcp
หากมีการตั้งค่าให้ลองปิดด้วยคำสั่ง:
Router#no ip dhcp bootp ignore
3. ตรวจสอบว่า Router หรือ Switch ได้รับ IP Address ถูกต้องหรือไม่
ใช้คำสั่ง:
Router#show ip interface brief
หากไม่มี IP Address ให้กำหนดใหม่ เช่น:
Router#interface GigabitEthernet0/0
Router#ip address 192.168.1.100 255.255.255.0
Router#no shutdown
Router#exit
4. หากต้องการใช้ TFTP จริง ๆ ให้ตรวจสอบการตั้งค่า TFTP Server
>ตรวจสอบว่า TFTP Server ทำงานอยู่
>ตรวจสอบว่า ไฟล์ network-confg มีอยู่จริง
>ตรวจสอบ Firewall ว่าเปิดพอร์ต UDP 69 หรือไม่
หากต้องการดาวน์โหลดไฟล์จาก TFTP Server ให้ใช้คำสั่ง:
Router#copy tftp://192.168.1.10/config.txt running-config
(เปลี่ยน 192.168.1.10 เป็น IP ของ TFTP Server)
วิธีแก้ปัญหา Cisco Router Write ลง Mem แล้ว Reload Config หาย
สรุปวิธีแก้ปัญหา
ให้ลองเช็ค config-register
#show version | include Configuration register
ถ้าเป็น 0x2142 ให้แก้เป็น 0x2102
ค่าปกติควรเป็น 0x2102
ถ้าเป็น 0x2142 แสดงว่า router ถูกตั้งค่าให้ข้าม startup-config
#configure terminal
#config-register 0x2102
#end
#write memory
#reload
ติดตั้ง Elasticsearch V.8
root@serv:/home/teee# wget -qO – https://artifacts.elastic.co/GPG-KEY-elasticsearch | sudo gpg –dearmor -o /usr/share/keyrings/elasticsearch-keyring.gpg
sudo: gpg: command not found
root@serv:/home/teee# apt-get install gpg -y
root@serv:/home/teee# wget -qO – https://artifacts.elastic.co/GPG-KEY-elasticsearch | sudo gpg –dearmor -o /usr/share/keyrings/elasticsearch-keyring.gpg
root@serv:/home/teee# echo “deb [signed-by=/usr/share/keyrings/elasticsearch-keyring.gpg] https://artifacts.elastic.co/packages/8.x/apt stable main” | sudo tee /etc/apt/sources.list.d/elastic-8.x.list
root@serv:/home/teee# sudo apt-get update && sudo apt-get install elasticsearch
————————— Security autoconfiguration information ——————————
Authentication and authorization are enabled.
TLS for the transport and HTTP layers is enabled and configured.
The generated password for the elastic built-in superuser is : EvW+InHCo0sPl-ej_M8t
If this node should join an existing cluster, you can reconfigure this with
‘/usr/share/elasticsearch/bin/elasticsearch-reconfigure-node –enrollment-token ‘
after creating an enrollment token on your existing cluster.
You can complete the following actions at any time:
Reset the password of the elastic built-in superuser with
‘/usr/share/elasticsearch/bin/elasticsearch-reset-password -u elastic’.
Generate an enrollment token for Kibana instances with
‘/usr/share/elasticsearch/bin/elasticsearch-create-enrollment-token -s kibana’.
Generate an enrollment token for Elasticsearch nodes with
‘/usr/share/elasticsearch/bin/elasticsearch-create-enrollment-token -s node’.
### Reset Elasticsearch Password ###
root@sanserv:/home/teee# /usr/share/elasticsearch/bin/elasticsearch-reset-password –interactive -u elastic
This tool will reset the password of the [elastic] user.
You will be prompted to enter the password.
Please confirm that you would like to continue [y/N]y
Enter password for [elastic]:
Re-enter password for [elastic]:
Password for the [elastic] user successfully reset.
AddNewUser
root@serv:/home/teee# /usr/share/elasticsearch/bin/elasticsearch-users useradd teee -p (MyPassword) -r superuser
root@serv:/home/teee# cat /etc/elasticsearch/users
usertest:(password)
ทดสอบการล็อกอิน
หลังเพิ่มผู้ใช้งานใหม่แล้ว ให้ทดสอบการล็อกอินด้วย curl:
# curl -u myuser:mypassword -X GET http://127.0.0.1:9200
root@serv:/home/teee# curl -u teee:(MyPassword)-X GET https://127.0.0.1:9200
curl: (60) SSL certificate problem: self-signed certificate in certificate chain
More details here: https://curl.se/docs/sslcerts.html
curl failed to verify the legitimacy of the server and therefore could not
establish a secure connection to it. To learn more about this situation and
how to fix it, please visit the web page mentioned above.
แก้ไขไฟล์คอนฟิก Elasticsearch:
root@serv:/home/teee# nano /etc/elasticsearch/elasticsearch.yml
เพิ่มหรือแก้ไขบรรทัดต่อไปนี้:
ตั้งค่าใหม่
root@serv:/home/teee# nano /etc/elasticsearch/elasticsearch.yml
#TEEE
cluster.name: (YourClustername)
node.name: node-1
path.data: /var/lib/elasticsearch
path.logs: /var/log/elasticsearch
network.host: 127.0.0.1
http.port: 9200
transport.port: 9300
cluster.initial_master_nodes: [“127.0.0.1”]
elasticsearch_username = teee
elasticsearch_password = (MyPassword)
elasticsearch_hosts = http://127.0.0.1:9200
elasticsearch_ssl_verification_mode = none
# ตั้งค่าจาก true เป็น false ถ้าเชื่อมต่อแบบ http
# Enable encryption for HTTP API client connections, such as Kibana, Logstash, and Agents
xpack.security.http.ssl:
enabled: false
keystore.path: certs/http.p12
ตั้งค่าจาก true เป็น false ถ้าเชื่อมต่อแบบ http
# Enable encryption and mutual authentication between cluster nodes
xpack.security.transport.ssl:
enabled: false
verification_mode: certificate
keystore.path: certs/transport.p12
truststore.path: certs/transport.p12
network.host: 0.0.0.0 # เปิดให้เข้าถึงจากทุกที่
# หรือ
network.host: 192.168.1.10 # ตั้งให้เฉพาะเครื่องที่มี IP นี้เท่านั้นที่สามารถเชื่อมต่อได้
คุณต้องตั้งค่าอย่างน้อยหนึ่งในตัวแปรด้านล่างในไฟล์ elasticsearch.yml เพื่อให้ Elasticsearch รู้จักวิธีค้นหาโหนดในคลัสเตอร์:
1.discovery.seed_hosts: ใช้ระบุโฮสต์หรือ IP ของโหนดในคลัสเตอร์ที่จะใช้ในการค้นหาโหนดอื่นๆ
2.discovery.seed_providers: ใช้ระบุโปรแกรมค้นหาของโหนดภายนอก เช่น zen-disco
3.cluster.initial_master_nodes: กำหนดโหนดที่สามารถเริ่มต้นเป็น Master Node ในคลัสเตอร์แรก
วิธีตั้งค่าที่แนะนำ:
•สำหรับการตั้งค่าผลิตภัณฑ์ที่มีหลายโหนด (Multiple Nodes), คำแนะนำคือการใช้ discovery.seed_hosts และ cluster.initial_master_nodes
# ตั้งค่า discovery.seed_hosts เป็น IP ของโหนดในคลัสเตอร์
discovery.seed_hosts: [“192.168.1.10”, “192.168.1.11”]
# ตั้งค่า cluster.initial_master_nodes สำหรับ Master Node เริ่มต้นในคลัสเตอร์
cluster.initial_master_nodes: [“node-1”, “node-2”]
ในที่นี้:
•discovery.seed_hosts คือรายการของ IP หรือชื่อโฮสต์ของโหนดที่สามารถค้นหาคลัสเตอร์ได้
•cluster.initial_master_nodes คือรายชื่อโหนดที่ Elasticsearch จะเลือกเป็น Master Node แรกเมื่อเริ่มต้นคลัสเตอร์ (สำหรับกรณีเริ่มต้นคลัสเตอร์ใหม่)
หมายเหตุ:
•cluster.initial_master_nodes จะต้องตั้งค่าบนโหนดทุกตัวในคลัสเตอร์ตอนเริ่มต้นครั้งแรก (หลังจากนั้นจะไม่จำเป็นต้องตั้งค่าอีก)
•เมื่อคลัสเตอร์เริ่มต้นแล้ว, คุณไม่จำเป็นต้องใช้ cluster.initial_master_nodes อีกต่อไป เพราะระบบจะใช้การตั้งค่า discovery.seed_hosts หรือ discovery.zen-disco สำหรับการค้นหาโหนดต่อไป
เริ่มบริการและตั้งค่าให้ Elasticsearch เริ่มทำงานทุกครั้งที่ระบบบูต:
SystemDiag ขณะที่ทำการ StartUP
root@serv:~# tail -f /var/log/elasticsearch/graylog.log
การเปิดใช้งานการเชื่อมต่อแบบ SSL/TLS ใน Elasticsearch ต้องทำการตั้งค่าคีย์และใบรับรองที่จำเป็นในไฟล์ elasticsearch.yml และสร้างหรือเพิ่มใบรับรองที่เหมาะสมสำหรับเซิร์ฟเวอร์
ขั้นตอนการเปิดใช้งาน SSL/TLS ใน Elasticsearch:
1. สร้างใบรับรอง (Certificate)
Elasticsearch มีเครื่องมือสำหรับสร้างใบรับรองที่มาพร้อมกับแพ็กเกจชื่อว่า elasticsearch-certutil:
สร้างใบรับรองสำหรับ HTTPS:
root@serv:/home/teee# cd /usr/share/elasticsearch/bin
root@serv:/usr/share/elasticsearch/bin# ./elasticsearch-certutil http
Generate a CSR? [y/N]y
Generate a certificate per node? [y/N]y
You can use any descriptive name that you like, but we recommend using the name
of the Elasticsearch node.
node #1 name: node-1
Enter all the hostnames that you need, one per line.
When you are done, press once more to move on to the next step.
localhost
Is this correct [Y/n]y
Enter all the IP addresses that you need, one per line.
When you are done, press once more to move on to the next step.
(enter your graylog ip address)
Is this correct [Y/n]y
Key Name: node-1
Subject DN: CN=node-1
Key Size: 2048
Do you wish to change any of these options? [y/N]n
Generate additional certificates? [Y/n]n
## What password do you want for your private key(s)?
Your private key(s) will be stored as a PEM formatted file.
We recommend that you protect your private keys with a password
If you do not wish to use a password, simply press at the prompt below.
Provide a password for the private key: [ for none]
What filename should be used for the output zip file? [/usr/share/elasticsearch/elasticsearch-ssl-http.zip]
root@serv:/usr/share/elasticsearch/bin# cd /usr/share/elasticsearch/
root@serv:/usr/share/elasticsearch# apt-get install zip -y
root@serv:/usr/share/elasticsearch# unzip elasticsearch-ssl-http.zip -d /etc/elasticsearch/certs
root@serv:/usr/share/elasticsearch# cd /etc/elasticsearch/certs
root@serv:/etc/elasticsearch/certs# ls -l
total 32
drwxr-xr-x 4 root root 4096 Jan 30 04:46 elasticsearch
-rw-rw—- 1 root elasticsearch 10029 Jan 30 02:07 http.p12
-rw-rw—- 1 root elasticsearch 1915 Jan 30 02:07 http_ca.crt
drwxr-xr-x 2 root root 4096 Jan 30 04:46 kibana
-rw-rw—- 1 root elasticsearch 5838 Jan 30 02:07 transport.p12
เปิดใช้งาน SSL
# Enable security features
xpack.security.enabled: true
xpack.security.enrollment.enabled: true
# Enable encryption for HTTP API client connections, such as Kibana, Logstash, and Agents
xpack.security.http.ssl:
enabled: true
keystore.path: /etc/elasticsearch/certs/http.p12
# Enable encryption and mutual authentication between cluster nodes
xpack.security.transport.ssl:
enabled: true
verification_mode: certificate
keystore.path: /etc/elasticsearch/certs/transport.p12
truststore.path: /etc/elasticsearch/certs/transport.p12
root@serv:/home/teee# systemctl start elasticsearch
ทดสอบการเชื่อมต่อแบบ SSL
root@serv:/etc/elasticsearch/certs# curl -u teee:MyPassword –cacert /etc/elasticsearch/certs/http_ca.crt -X GET https://127.0.0.1:9200
{
“name” : “node-1”,
“cluster_name” : “graylog”,
“cluster_uuid” : “B92A2i1YQNSmfsRo60NRnQ”,
“version” : {
“number” : “8.17.1”,
“build_flavor” : “default”,
“build_type” : “deb”,
“build_hash” : “d4b391d925c31d262eb767b8b2db8f398103f909”,
“build_date” : “2025-01-10T10:08:26.972230187Z”,
“build_snapshot” : false,
“lucene_version” : “9.12.0”,
“minimum_wire_compatibility_version” : “7.17.0”,
“minimum_index_compatibility_version” : “7.0.0”
},
“tagline” : “You Know, for Search”
}
ติดตั้ง Graylog บน Debian12 เพื่อเก็บ Log การใช้งาน Internet
1. อัปเดตระบบ
ก่อนอื่น อัปเดตระบบให้เป็นเวอร์ชันล่าสุด:
root@serv:/home/test# apt update && sudo apt upgrade -y
root@serv:~# dpkg-reconfigure tzdata
เลือก zone เวลาประเทศไทย Bangkok/Thailand
2. ติดตั้ง Java
Graylog ต้องการ Java 11 หรือสูงกว่า ติดตั้ง OpenJDK 11:
root@serv:/home/test# sudo apt install openjdk-11-jre-headless -y
Reading package lists… Done
Building dependency tree… Done
Reading state information… Done
Package openjdk-11-jre-headless is not available, but is referred to by another package.
This may mean that the package is missing, has been obsoleted, or
is only available from another source
E: Package ‘openjdk-11-jre-headless’ has no installation candidate
ถ้าขึ้น Error แบบนี้แสดงว่า ไม่มีแพคเกจนี้ใน repository ให้ลองทำการค้นหาดูก่อน
root@serv:/home/test# apt-get install aptitude -y
root@serv:/home/test# aptitude search openjdk
Warning: Invalid locale (please review locale settings, this might lead to problems later):
locale::facet::_S_create_c_locale name not valid
i openjdk-17-jdk-headless – OpenJDK Development Kit (JDK) (headless)
root@serv:/home/test# apt-get install openjdk-17-jdk-headless -y
ตรวจสอบเวอร์ชัน Java:
root@serv:/home/test# java -version
openjdk version “17.0.13” 2024-10-15
OpenJDK Runtime Environment (build 17.0.13+11-Debian-2deb12u1)
OpenJDK 64-Bit Server VM (build 17.0.13+11-Debian-2deb12u1, mixed mode, sharing)
3. ติดตั้ง Elasticsearch
Graylog ไม่รองรับ Elasticsearch เวอร์ชัน 8.17.1 เนื่องจาก Graylog รองรับเพียง Elasticsearch เวอร์ชัน 7.x เท่านั้น (ณ เวอร์ชันที่คุณใช้อยู่ 6.1.5) รวมถึง OpenSearch 1.x หรือ 2.x
ถ้ามี version ใหม่กว่าให้ลบออกแล้วลงเวอร์ชัน 7.x
sudo systemctl stop elasticsearch
sudo apt remove –purge elasticsearch -y
sudo apt autoremove -y
sudo rm -rf /etc/elasticsearch /var/lib/elasticsearch
root@serv:~# wget -qO – https://artifacts.elastic.co/GPG-KEY-elasticsearch | sudo apt-key add –
echo “deb https://artifacts.elastic.co/packages/7.x/apt stable main” | sudo tee -a /etc/apt/sources.list.d/elastic-7.x.list
root@serv:~# apt update
root@serv:~# apt install elasticsearch=7.17.10 -y
root@serv:/home/test# nano /etc/elasticsearch/elasticsearch.yml
#TEEE
cluster.name: graylog
node.name: node-1
path.data: /var/lib/elasticsearch
path.logs: /var/log/elasticsearch
network.host: 127.0.0.1
http.port: 9200
transport.port: 9300
cluster.initial_master_nodes: [“127.0.0.1”]
AddNewUser
root@serv:/home/test# /usr/share/elasticsearch/bin/elasticsearch-users useradd test -p (MyPassword) -r superuser
root@serv:/home/test# cat /etc/elasticsearch/users
test:$2a$10$239ChoJHF5SOYzzs4/x92uFJnvEDpzCpeB9LA6pLCQaxCHE.wYX4m
ทดสอบการล็อกอินหลังเพิ่มผู้ใช้งานใหม่แล้ว ให้ทดสอบการล็อกอินด้วย curl:
root@serv:/etc/graylog/server# curl -u teee:MyPassword -X GET http://127.0.0.1:9200
{
“name” : “node-1”,
“cluster_name” : “graylog”,
“cluster_uuid” : “EqZOdYvFQ1ehJazh-Olfiw”,
“version” : {
“number” : “7.17.10”,
“build_flavor” : “default”,
“build_type” : “deb”,
“build_hash” : “fecd68e3150eda0c307ab9a9d7557f5d5fd71349”,
“build_date” : “2023-04-23T05:33:18.138275597Z”,
“build_snapshot” : false,
“lucene_version” : “8.11.1”,
“minimum_wire_compatibility_version” : “6.8.0”,
“minimum_index_compatibility_version” : “6.0.0-beta1”
},
“tagline” : “You Know, for Search”
}
root@serv:/home/test# systemctl daemon-reload
root@serv:/home/test# systemctl enable elasticsearch
Created symlink /etc/systemd/system/multi-user.target.wants/elasticsearch.service → /lib/systemd/system/elasticsearch.service.
root@serv:/home/test# systemctl start elasticsearch
root@serv:/home/test# netstat -lntup
Active Internet connections (only servers)
Proto Recv-Q Send-Q Local Address Foreign Address State PID/Program name
tcp 0 0 127.0.0.1:27017 0.0.0.0:* LISTEN 502/mongod
tcp 0 0 0.0.0.0:22 0.0.0.0:* LISTEN 517/sshd: /usr/sbin
tcp6 0 0 127.0.0.1:9200 :::* LISTEN 2069/java <–ElasticSearch
tcp6 0 0 127.0.0.1:9300 :::* LISTEN 2069/java <–ElasticSearch
tcp6 0 0 :::22 :::* LISTEN 517/sshd: /usr/sbin
4. ติดตั้ง MongoDB
Graylog ใช้ MongoDB เป็นฐานข้อมูล ติดตั้ง MongoDB:
Ref >> https://www.mongodb.com/docs/manual/tutorial/install-mongodb-on-debian/
Install MongoDB Community Edition
root@serv:/home/test# apt-get install gnupg curl
root@serv:/home/test# curl -fsSL https://www.mongodb.org/static/pgp/server-8.0.asc | \
sudo gpg -o /usr/share/keyrings/mongodb-server-8.0.gpg \
–dearmor
root@serv:/home/test# echo “deb [ signed-by=/usr/share/keyrings/mongodb-server-8.0.gpg ] http://repo.mongodb.org/apt/debian bookworm/mongodb-org/8.0 main” | sudo tee /etc/apt/sources.list.d/mongodb-org-8.0.list
root@serv:/home/test# sudo apt-get update
root@serv:/home/test# sudo apt-get install -y mongodb-org
root@serv:/home/test# systemctl start mongod
root@serv:/home/test# systemctl daemon-reload
root@serv:/home/test# systemctl status mongod
● mongod.service – MongoDB Database Server
Loaded: loaded (/lib/systemd/system/mongod.service; disabled; preset: enabled)
Active: active (running) since Thu 2025-01-30 02:29:30 EST; 21s ago
Docs: https://docs.mongodb.org/manual
Main PID: 4198 (mongod)
Memory: 99.4M
CPU: 795ms
CGroup: /system.slice/mongod.service
└─4198 /usr/bin/mongod –config /etc/mongod.conf
root@serv:/home/test# systemctl enable mongod
Created symlink /etc/systemd/system/multi-user.target.wants/mongod.service → /lib/systemd/system/mongod.service.
5. ติดตั้ง Graylog
ดาวน์โหลดและติดตั้ง Graylog:
Ref >> https://packages.graylog2.org/debian/dists/stable
Ref >> https://go2docs.graylog.org/current/downloading_and_installing_graylog/installing_graylog.html#operating-system-packages
root@serv:/home/test# wget https://packages.graylog2.org/repo/packages/graylog-6.1-repository_latest.deb
root@serv:/home/test# sudo dpkg -i graylog-6.1-repository_latest.deb
root@serv:/home/test# sudo apt-get update
root@serv:/home/test# apt-get install graylog-server -y
สร้างรหัสผ่านสำหรับ password_secret และ root_password_sha2:
root@serv:/home/test# apt-get install pwgen
root@serv:/home/test# pwgen -N 1 -s 96
sCRa5Fkln0DIcesA92N3cYRBFuPANWTh7XZbe1qMLe0jxqWqAUnujrpN23Eje66VjwiknOb8n2aWqffqFc1vHe89vPrQWNrL
echo -n “รหัสผ่านของคุณ” | sha256sum
root@serv:/home/test# echo -n admin | sha256sum
8c6976e5b5210413bde908bd3dae15dfb167a9c873fc4bb8a81f6f2ab448a918
แก้ไขไฟล์คอนฟิก Graylog:
เพิ่มหรือแก้ไขบรรทัดต่อไปนี้:
password_secret = <รหัสที่สร้างจาก pwgen> sCRa5Fkln0DIcesA92N3cYRBFuPANWTh7XZbe1qMLe0jxqWqAUnujrpN23Eje66VjwiknOb8n2aWqffqFc1vHe89vPrQWNrL
root_password_sha2 = <รหัสที่สร้างจาก sha256sum> 8c6976e5b5210413bde908bd3dae15dfb167a9c873fc4bb8a81f6f2ab448a918
http_bind_address = 0.0.0.0:9000
elasticsearch_hosts = http://127.0.0.1:9200
mongodb_uri = mongodb://localhost/graylog
elasticsearch_hosts = http://127.0.0.1:9200
elasticsearch_username = teee
elasticsearch_password = MyPassword
root@serv:/home/test# nano /etc/graylog/server/server.conf
root@serv:/home/test# systemctl status graylog-server
● graylog-server.service – Graylog server
Loaded: loaded (/lib/systemd/system/graylog-server.service; enabled; preset: enabled)
Active: active (running) since Thu 2025-01-30 03:16:20 EST; 1min 23s ago
Docs: http://docs.graylog.org/
Main PID: 5466 (graylog-server)
Tasks: 31 (limit: 4643)
Memory: 324.2M
CPU: 7.262s
CGroup: /system.slice/graylog-server.service
├─5466 /bin/sh /usr/share/graylog-server/bin/graylog-server
└─5467 /usr/share/graylog-server/jvm/bin/java -Xms1g -Xmx1g -server -XX:+UseG1GC -XX:-OmitStackTraceInFastThrow -Djdk.tls.acknow>
ตรวจสอบ Log ของ Graylog:
root@serv:~# tail -f /var/log/graylog-server/server.log
======================================================================================
It seems you are starting Graylog for the first time. To set up a fresh install, a setup interface has
been started. You must log in to it to perform the initial configuration and continue.
Initial configuration is accessible at 0.0.0.0:9000, with username ‘admin’ and password ‘SuTAuVqwmF’.
Try clicking on http://admin:SuTAuVqwmF@0.0.0.0:9000
======================================================================================
http://(IP Address):9000
Wi-Fi Web Authentication Project
Wifi Project
1. Debian 12.8.0
2. MariaDB 10.11.6
3. Apache 2.4.62
4. Php 8.2.26
5. phpMyAdmin 5.2.1
6. FreeRadius 3.2.1
7. daloradius 2.2 beta
root@san:/home/teee# apt-get install sudo net-tools -y
root@san:/home/teee# sudo locale-gen
== MariaDB ==
root@san:/home/teee# apt-get install mariadb-server mariadb-client
root@san:/home/teee# mysql_secure_installation
Enter current password for root (enter for none):
Switch to unix_socket authentication [Y/n] y
Change the root password? [Y/n] y
New password: SecurePass
Re-enter new password:
Password updated successfully!
Reloading privilege tables..
… Success!
Remove anonymous users? [Y/n] y
Disallow root login remotely? [Y/n] y
Remove test database and access to it? [Y/n] y
Reload privilege tables now? [Y/n] y
Lock localhost Password
MariaDB [(none)]> ALTER USER ‘root’@’localhost’ IDENTIFIED VIA mysql_native_password USING PASSWORD(‘YourSecurePassword’);
Query OK, 0 rows affected (0.014 sec)
MariaDB [(none)]> FLUSH PRIVILEGES;
Query OK, 0 rows affected (0.002 sec)
== apache2 ==
root@san:/home/teee# apt-get install apache2 apache2-doc
== PHP ==
root@san:/home/teee# apt-get install php libapache2-mod-php php-mysql php-common php-gd php-mbstring php-curl php-xml
root@san:/home/teee# nano /etc/apache2/mods-available/dir.conf
#DirectoryIndex index.html index.cgi index.pl index.php index.xhtml index.htm
DirectoryIndex index.php index.html index.cgi index.pl index.php index.$
root@san:/home/teee# systemctl restart apache2
== Perl ==
root@san:/home/teee# apt-get install perl libapache2-mod-perl2
== Python ==
root@san:/home/teee# apt-get install python3 libapache2-mod-python
==Test PHP ==
root@san:/home/teee# nano /var/www/html/test.php
<?php phpinfo(); ?>
== phpMyAdmin ==
root@san:/home/teee# apt-get install phpmyadmin
root@san:~# nano /etc/apache2/sites-available/phpmyadmin.conf
<VirtualHost *:8081>
ServerAdmin webmaster@localhost
DocumentRoot /usr/share/phpmyadmin
ErrorLog ${APACHE_LOG_DIR}/error.log
CustomLog ${APACHE_LOG_DIR}/access.log combined
</VirtualHost>
root@san:~# nano /etc/apache2/ports.conf
Listen 8081
Enabling site phpmyadmin.
To activate the new configuration, you need to run:
systemctl reload apache2
root@san:~# systemctl reload apache2
http://192.168.64.17:8081
== Install FreeRADIUS on Debian ==
root@san:/home/teee# apt-get install -y freeradius freeradius-utils freeradius-mysql
root@san:/home/teee# systemctl enable freeradius
root@san:/home/teee# systemctl stop freeradius
Next, run FreeRADIUS in debug mode:
root@san:/home/teee# freeradius -X
If everything’s working OK, the output should be something like this:
…
listen {
type = “acct”
ipv6addr = ::
port = 0
limit {
max_connections = 16
lifetime = 0
idle_timeout = 30
}
}
Listening on auth address 127.0.0.1 port 18120 bound to server inner-tunnel
Listening on auth address * port 1812 bound to server default
Listening on acct address * port 1813 bound to server default
Listening on auth address :: port 1812 bound to server default
Listening on acct address :: port 1813 bound to server default
Listening on proxy address * port 39265
Listening on proxy address :: port 40985
Ready to process requests
Log into the MySQL console as root:
root@san:/home/teee# mysql -u root -p
Enter password:
Welcome to the MariaDB monitor. Commands end with ; or \g.
Your MariaDB connection id is 68
Server version: 10.11.6-MariaDB-0+deb12u1 Debian 12
Copyright (c) 2000, 2018, Oracle, MariaDB Corporation Ab and others.
Type ‘help;’ or ‘\h’ for help. Type ‘\c’ to clear the current input statement.
MariaDB [(none)]>
Create a database and user for RADIUS:
MariaDB [(none)]> create database radius;
Query OK, 1 row affected (0.018 sec)
MariaDB [(none)]> grant all privileges on radius.* to radius@localhost identified by ‘SecurePass’;
Query OK, 0 rows affected (0.024 sec)
MariaDB [(none)]> flush privileges;
Query OK, 0 rows affected (0.020 sec)
MariaDB [(none)]> quit
Bye
Next, import the FreeRADIUS database schema that shipped with FreeRADIUS
root@san:/home/teee# cd /etc/freeradius/3.0/mods-config/sql/main/mysql/
root@san:/etc/freeradius/3.0/mods-config/sql/main/mysql# ls
extras process-radacct.sql queries.conf schema.sql setup.sql
root@san:/etc/freeradius/3.0/mods-config/sql/main/mysql# mysql -u root -p radius < schema.sql
Enter password:
Enable the FreeRADIUS SQL module by creating a symbolic link to the sql module from /etc/freeradius/3.0/mods-available/ to mods-enabled:
root@san:/etc/freeradius/3.0/mods-config/sql/main/mysql# cd
root@san:~# ln -s /etc/freeradius/3.0/mods-available/sql /etc/freeradius/3.0/mods-enabled/
Open /etc/freeradius/3.0/mods-available/sql
root@san:~# nano /etc/freeradius/3.0/mods-available/sql
dialect = “mysql”
driver = “rlm_sql_mysql”
server = “localhost”
port = 3306
login = “radius”
password = “SecurePass”
radius_db = “radius”
read_clients = yes
Disable MySQL SSL connection.
# If any of the files below are set, TLS encryption is enabled
# tls {
# ca_file = “/etc/ssl/certs/my_ca.crt”
# ca_path = “/etc/ssl/certs/”
# certificate_file = “/etc/ssl/certs/private/client.crt”
# private_key_file = “/etc/ssl/certs/private/client.key”
# cipher = “DHE-RSA-AES256-SHA:AES128-SHA”
#
# tls_required = yes
# tls_check_cert = no
# tls_check_cert_cn = no
# }
root@san:~# chown -h freerad:freerad /etc/freeradius/3.0/mods-enabled/sql
root@san:~# ls -l /etc/freeradius/3.0/mods-enabled/sql
lrwxrwxrwx 1 freerad freerad 38 Jan 7 21:01 /etc/freeradius/3.0/mods-enabled/sql -> /etc/freeradius/3.0/mods-available/sql
root@san:~# systemctl restart freeradius
วิธีทดสอบว่า freeradius ใช้ฐานของมูล mysql แล้ว
1. เช็ค Status ของ Service Freeradius ว่ายังสามารถรันได้ปกติ
# netstat -lntup
# systemctl status freeradius
2. ลองเพิ่ม User ใน MySQL แล้วเทส Authen
เข้า mysql
MariaDB [(none)]> USE radius;
INSERT INTO radcheck (username, attribute, op, value) VALUES (‘testuser’, ‘Cleartext-Password’, ‘:=’, ‘testpass’);
MariaDB [radius]> quit
ลองรันเทสดู
root@npx:/home/teee# radtest testuser testpass localhost 0 testing123
Sent Access-Request Id 182 from 0.0.0.0:52750 to 127.0.0.1:1812 length 78
User-Name = “testuser”
User-Password = “testpass”
NAS-IP-Address = 127.0.1.1
NAS-Port = 0
Message-Authenticator = 0x00
Cleartext-Password = “testpass”
Received Access-Accept Id 182 from 127.0.0.1:1812 to 127.0.0.1:52750 length 20
ถ้าเทสผ่านแล้วเพื่อความปลอดภัยอย่าลืมไปแก้ไข
#nano /etc/freeradius/3.0/clients.conf
มองหาบล็อกประมาณนี้:
client localhost {
ipaddr = 127.0.0.1
secret = testing123
require_message_authenticator = no
}
secret = testing123 <–อยากเปลี่ยนเป็นอะไรก็เปลี่ยนได้
root@san:~#systemctl restart freeradius
== Install daloRADIUS on Debian ==
root@san:~# apt-get install php-mail php-mail-mime php-pear
root@san:~# pear install DB
WARNING: channel “pear.php.net” has updated its protocols, use “pear channel-update pear.php.net” to update
downloading DB-1.12.2.tgz …
Starting to download DB-1.12.2.tgz (137,662 bytes)
………………………..done: 137,662 bytes
install ok: channel://pear.php.net/DB-1.12.2
root@san:~# pear install MDB2
WARNING: channel “pear.php.net” has updated its protocols, use “pear channel-update pear.php.net” to update
downloading MDB2-2.4.1.tgz …
Starting to download MDB2-2.4.1.tgz (121,557 bytes)
……………………..done: 121,557 bytes
install ok: channel://pear.php.net/MDB2-2.4.1
MDB2: Optional feature fbsql available (Frontbase SQL driver for MDB2)
MDB2: Optional feature ibase available (Interbase/Firebird driver for MDB2)
MDB2: Optional feature mysql available (MySQL driver for MDB2)
MDB2: Optional feature mysqli available (MySQLi driver for MDB2)
MDB2: Optional feature mssql available (MS SQL Server driver for MDB2)
MDB2: Optional feature oci8 available (Oracle driver for MDB2)
MDB2: Optional feature pgsql available (PostgreSQL driver for MDB2)
MDB2: Optional feature querysim available (Querysim driver for MDB2)
MDB2: Optional feature sqlite available (SQLite2 driver for MDB2)
MDB2: To install optional features use “pear install pear/MDB2#featurename”
https://sourceforge.net/projects/daloradius/files/
root@san:~# wget http://liquidtelecom.dl.sourceforge.net/project/daloradius/daloradius/daloradius0.9-9/daloradius-0.9-9.tar.gz
root@san:~# tar xvf daloradius-0.9-9.tar.gz
root@san:~# apt -y install unzip
root@san:~# wget https://github.com/lirantal/daloradius/archive/master.zip
root@san:~# unzip master.zip
root@san:~# mv daloradius-master daloradius
root@san:~# cd daloradius/
root@san:~/daloradius/contrib/db# sudo mysql -u root -p radius < fr3-mariadb-freeradius.sql
root@san:~/daloradius/contrib/db# sudo mysql -u root -p radius < mariadb-daloradius.sql
root@san:~# mkdir /var/www/html/raddb
root@san:/home/teee/daloradius# cp -R app /var/www/html/raddb/
root@san:/home/teee/daloradius# chown -R www-data:www-data /var/www/html/raddb/
root@san:/home/teee# cp -R daloradius/ /var/www/
root@san:~# cd /var/www/daloradius/
root@san:/var/www/daloradius# mkdir -p var/{log,backup}
root@san:/var/www/daloradius# chown -R www-data:www-data var
sudo tee /etc/apache2/ports.conf<<EOF
Listen 88
Listen 8000
<IfModule ssl_module>
Listen 443
</IfModule>
<IfModule mod_gnutls.c>
Listen 443
</IfModule>
EOF
======================
root@san:/etc/apache2# sudo tee /etc/apache2/sites-available/operators.conf<<EOF
<VirtualHost *:8000>
ServerAdmin operators@localhost
DocumentRoot /var/www/daloradius/app/operators
<Directory /var/www/daloradius/app/operators>
Options -Indexes +FollowSymLinks
AllowOverride None
Require all granted
</Directory>
<Directory /var/www/daloradius>
Require all denied
</Directory>
ErrorLog \${APACHE_LOG_DIR}/daloradius/operators/error.log
CustomLog \${APACHE_LOG_DIR}/daloradius/operators/access.log combined
</VirtualHost>
EOF
==================
root@san:/etc/apache2# sudo tee /etc/apache2/sites-available/users.conf<<EOF
<VirtualHost *:88>
ServerAdmin users@localhost
DocumentRoot /var/www/daloradius/app/users
<Directory /var/www/daloradius/app/users>
Options -Indexes +FollowSymLinks
AllowOverride None
Require all granted
</Directory>
<Directory /var/www/daloradius>
Require all denied
</Directory>
ErrorLog \${APACHE_LOG_DIR}/daloradius/users/error.log
CustomLog \${APACHE_LOG_DIR}/daloradius/users/access.log combined
</VirtualHost>
EOF
=======================
root@san:/etc/apache2# sudo a2ensite users.conf operators.conf
Enabling site users.
Enabling site operators.
To activate the new configuration, you need to run:
systemctl reload apache2
root@san:/etc/apache2# mkdir -p /var/log/apache2/daloradius/{operators,users}
root@san:/etc/apache2# sudo a2dissite 000-default.conf
Site 000-default disabled.
To activate the new configuration, you need to run:
systemctl reload apache2
root@san:/etc/apache2# systemctl restart apache2 freeradius
root@san:/etc/apache2# systemctl status apache2 freeradius
● apache2.service – The Apache HTTP Server
Loaded: loaded (/lib/systemd/system/apache2.service; enabled; preset: enabled)
Active: active (running) since Wed 2025-01-08 01:03:12 +07; 41s ago
Docs: https://httpd.apache.org/docs/2.4/
Process: 758 ExecStart=/usr/sbin/apachectl start (code=exited, status=0/SUCCESS)
Main PID: 762 (/usr/sbin/apach)
Tasks: 6 (limit: 4649)
Memory: 20.9M
CPU: 520ms
CGroup: /system.slice/apache2.service
├─762 /usr/sbin/apache2 -k start
├─763 /usr/sbin/apache2 -k start
├─764 /usr/sbin/apache2 -k start
├─765 /usr/sbin/apache2 -k start
├─766 /usr/sbin/apache2 -k start
└─767 /usr/sbin/apache2 -k start
Jan 08 01:03:11 san systemd[1]: Starting apache2.service – The Apache HTTP Server…
Jan 08 01:03:12 san systemd[1]: Started apache2.service – The Apache HTTP Server.
● freeradius.service – FreeRADIUS multi-protocol policy server
Loaded: loaded (/lib/systemd/system/freeradius.service; enabled; preset: enabled)
Active: active (running) since Wed 2025-01-08 01:03:13 +07; 40s ago
Docs: man:radiusd(8)
man:radiusd.conf(5)
http://wiki.freeradius.org/
http://networkradius.com/doc/
Process: 755 ExecStartPre=/usr/sbin/freeradius $FREERADIUS_OPTIONS -Cx -lstdout (code=exited, status=0/SUCCESS)
Main PID: 769 (freeradius)
Status: “Processing requests”
Tasks: 6 (limit: 4649)
Memory: 78.6M (limit: 2.0G)
CPU: 1.487s
CGroup: /system.slice/freeradius.service
└─769 /usr/sbin/freeradius -f
Jan 08 01:03:12 san freeradius[755]: Compiling Auth-Type PAP for attr Auth-Type
Jan 08 01:03:12 san freeradius[755]: Compiling Auth-Type CHAP for attr Auth-Type
Jan 08 01:03:12 san freeradius[755]: Compiling Auth-Type MS-CHAP for attr Auth-Type
Jan 08 01:03:12 san freeradius[755]: Compiling Autz-Type New-TLS-Connection for attr Autz-Type
Jan 08 01:03:12 san freeradius[755]: Compiling Post-Auth-Type REJECT for attr Post-Auth-Type
Jan 08 01:03:12 san freeradius[755]: Compiling Post-Auth-Type Challenge for attr Post-Auth-Type
Jan 08 01:03:12 san freeradius[755]: Compiling Post-Auth-Type Client-Lost for attr Post-Auth-Type
root@san:/etc/apache2# netstat -lntup
Active Internet connections (only servers)
Proto Recv-Q Send-Q Local Address Foreign Address State PID/Program name
tcp 0 0 127.0.0.1:3306 0.0.0.0:* LISTEN 517/mariadbd
tcp 0 0 0.0.0.0:22 0.0.0.0:* LISTEN 441/sshd: /usr/sbin
tcp6 0 0 :::8000 :::* LISTEN 762/apache2
tcp6 0 0 :::88 :::* LISTEN 762/apache2
tcp6 0 0 :::22 :::* LISTEN 441/sshd: /usr/sbin
udp 0 0 0.0.0.0:68 0.0.0.0:* 363/dhclient
udp 0 0 0.0.0.0:54050 0.0.0.0:* 769/freeradius
udp 0 0 127.0.0.1:18120 0.0.0.0:* 769/freeradius
udp 0 0 0.0.0.0:1812 0.0.0.0:* 769/freeradius
udp 0 0 0.0.0.0:1813 0.0.0.0:* 769/freeradius
udp6 0 0 :::57992 :::* 769/freeradius
udp6 0 0 :::1812 :::* 769/freeradius
udp6 0 0 :::1813 :::* 769/freeradius
http://192.168.64.17:88/login.php
http://192.168.64.17:8000/login.php
Window11 ติดตั้งเครื่องใหม่ข้ามขั้นตอนการ Sign In Microsoft Account
วิธีการข้ามขั้นตอนการ Sign In Microsoft Account หลังจากที่ติดตั้งเครื่องใหม่ของ Windows11
1. เมื่อถึงหน้าให้ต่อ internet กดปุ่ม Shift + F10 เพื่อเปิดหน้าต่าง command prompt ขึ้นมา
2. พิมพ์คำสั่ง oobe\bypassnro กด Enter
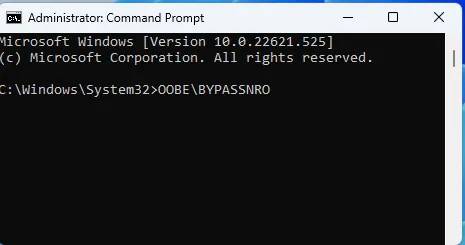
3. เลือก i don’t have internet ที่หน้าติดตั้ง windows และทำตามขั้นตอนไปเรื่อยๆจนกว่าจะเสร็จ